Installation Flow Guide
The installation flow is a very important part of the Merchant's journey when using the applications published on Tiendanube's App Store. So we have to make sure that this step is working without any problem.
Therefore, we provide a guide on how the installation flow of an application in Tiendanube should work. We've divided this guide into two parts:
- Requires approval: when Partner approval is required for the Merchant to start using the application
- No approval required: when Partner approval is not required for the Merchant to start using the application
Requires approval
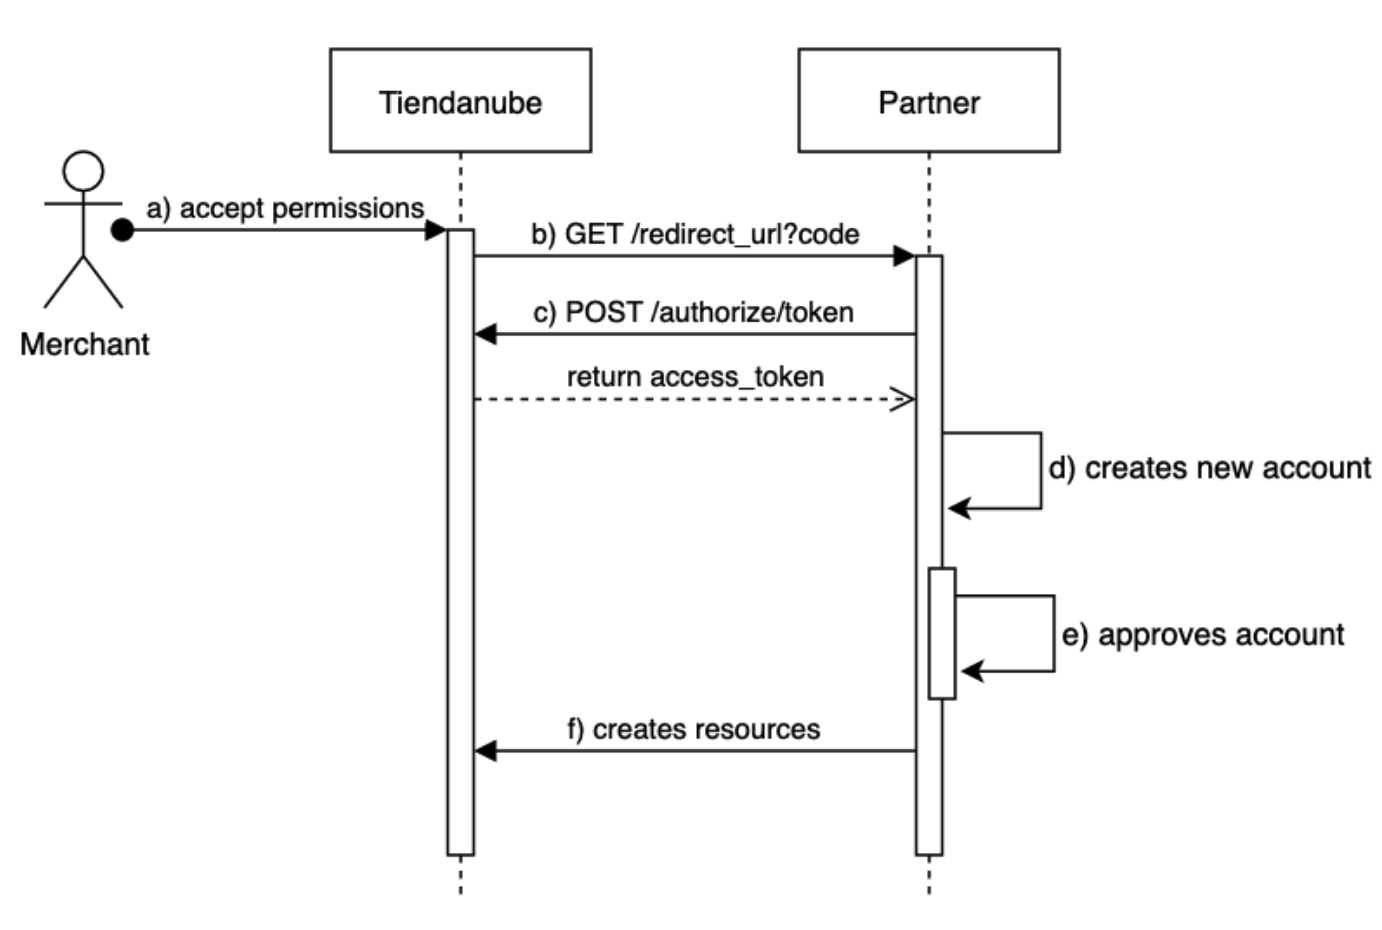
When partner approval is required for the Merchant to start using the application, normally the installation flow goes through 3 major steps: generation of the access_token, creation/approval of the account and creation of resources. Let's take a closer look at the diagram below:

Note: it is very important to take into account that the creation of resources should only be done if the Merchant account is approved
1. Generation of access_token
a) Accept permissions: the flow starts with the Merchant going to Tiendanube's App Store to install the application. When clicking install on the application's detail page, Merchant will be redirected to the administrator where it must accept permissions and continue the installation.
b) GET /redirect_url?code: the Merchant will be redirected to the partner's callback url.
c) POST /authorize/token: the Partner then uses the authorization_code parameter to generate the access_token.
Note: This process is further detailed in the Authorization Flow section.
2. Account Creation
d) Creates new account: in this example we are considering a shopkeeper who does not have an account in the app, so he will go through the registration flow where he must create a new account.
e) Approves account: approving the account depends entirely on the partner and is done in different ways. When the Merchant has your account approved, it is important to notify him (email, sms, etc) so he can start using the App.
Note: it is important to make it clear to the Merchant what happens after completing the registration and how long it will take for this to happen. Some examples: "Thank you for registering! Our sales team will contact you within 48 hours" or "Thank you for completing your registration! We will send you an email as soon as we validate your data. This process can take up to 72 hours"
3. Creation of resources
f) Creates resources: resources vary according to the type of application. Example: if it is a shipping app, it will create a shipping carrier. If it's a payments app, it will create a payment provider. If it's a Marketing app, maybe a script. Here it is important to ensure that the resource is being created only after the account has been approved and that the resource is not created duplicate (for this, you would first need to check if it exists).
Things to avoid in the installation flow:
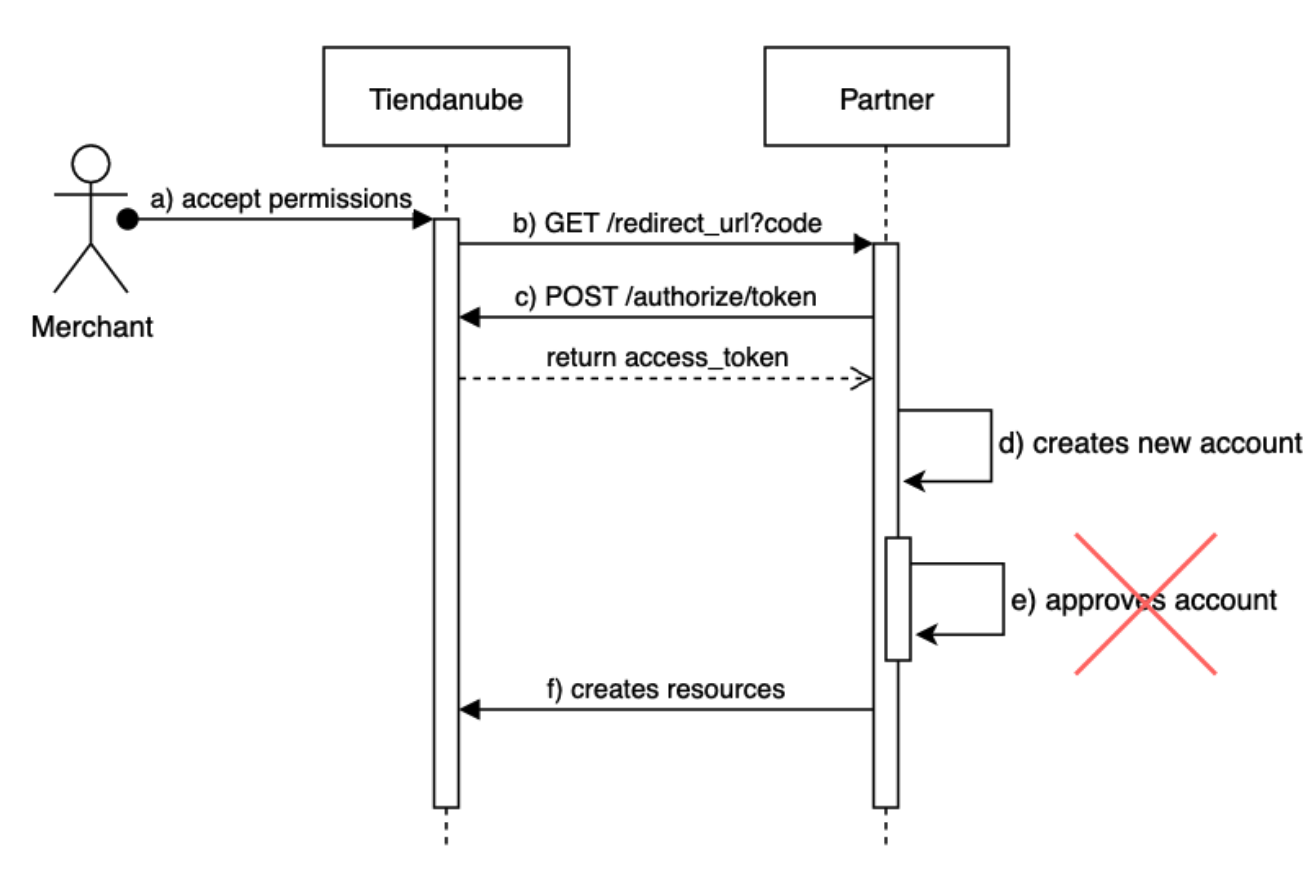
- Creating resources before the Merchant has his account approved: this would cause confusion, since in the admin the merchant would see, for example, a shipping carrier or payment provider created, but he would not be able to use them, since prior approval is required
- At the end of the approval, the Merchant will have to go through the installation process again: this generates a repeated step, since the Merchant has already done the installation. Having to redo the installation can give a bad impression of the integration.
Does not require approval
In this case the only thing that would change is that we would not have step e) being executed, since an account approval is not required. Therefore, resource creation could happen right after the new account is created.

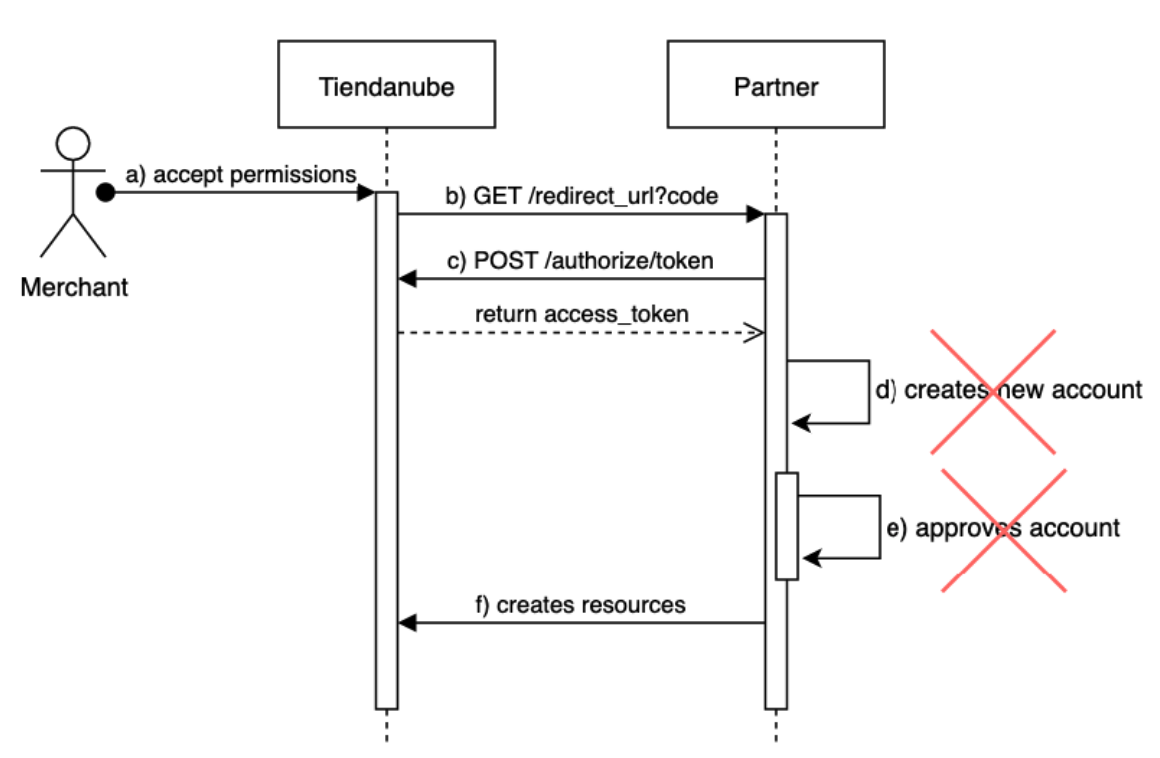
Some partners implement an even simpler flow: account creation and approval are done automatically. The shopkeepers do not have to do anything more than accept the permissions of the application and the account is generated without further interaction.

Note: In these cases, Partners use store information (email, business_id, business_address, etc) available at the GET /store endpoint to generate a new account for the store owner.
Note: check out these examples of apps that automatically generate a new account for the merchant: example 1 and example 2.
FAQ
What are the types of installation?
From the App Store: for the installation to take place from the App Store, the App must be published in the App Store (previously, the App must go through an approval process to be approved). This is a great option for partners who want to offer their App to the entire base of Tiendanube shopkeepers.
From the installation link: the installation link allows any shopkeeper to install the App, even if it is not published in the Tiendanube App Store. Many partners use this installation link to create an installation flow from the App or to share it directly with Merchants interested in using the App. Because the App was not evaluated by the Tiendanube technical team, it may not be in accordance with the quality standards that we verified in the approval meeting. Therefore, we strongly recommend that approval be carried out to ensure a better experience for our Merchants and at the same time enable the App to be made public on the App Store.
What happens when I install the App already installed?
In this case, the only thing to do is regenerate the access_token. No resources should be created, changed or deleted. Creating a new resource would result in duplicate resources within the store, which can lead to confusion for the Merchant. To avoid this, it's a good idea to first check whether the resource already exists before creating it. This can be done using a GET call to the resource you want to create before creating it.
When uninstalling the App, which features are automatically deleted?
When an App is installed, resources are created in the store. When uninstalling, the following resources created by the App are automatically deleted by Nuvemshop: shipping carrier, payment providers, webhook and scripts. All other resources created will remain in the store.